
Connect an MCP server and verify its tools
Use the IDE MCP manager, confirm the connection, and run a small read-only check.
Sources checked / updated · 8 min read
What this exercise covers
Connect one external service and prove that the agent can read a specific piece of information from it. Start with a test account or sample project. No specific paid service is required; choose a provider you already use and whose MCP instructions you can verify.
1. Open the IDE MCP manager
The official MCP guide documents the IDE path: open the agent panel's … → MCP Servers, choose a supported server, and follow its installation and authentication prompts.
For a custom integration, use Manage MCP Servers → View raw config. Follow the provider's exact configuration; local process and remote server connections need different fields. Preserve existing entries instead of replacing the entire configuration file.
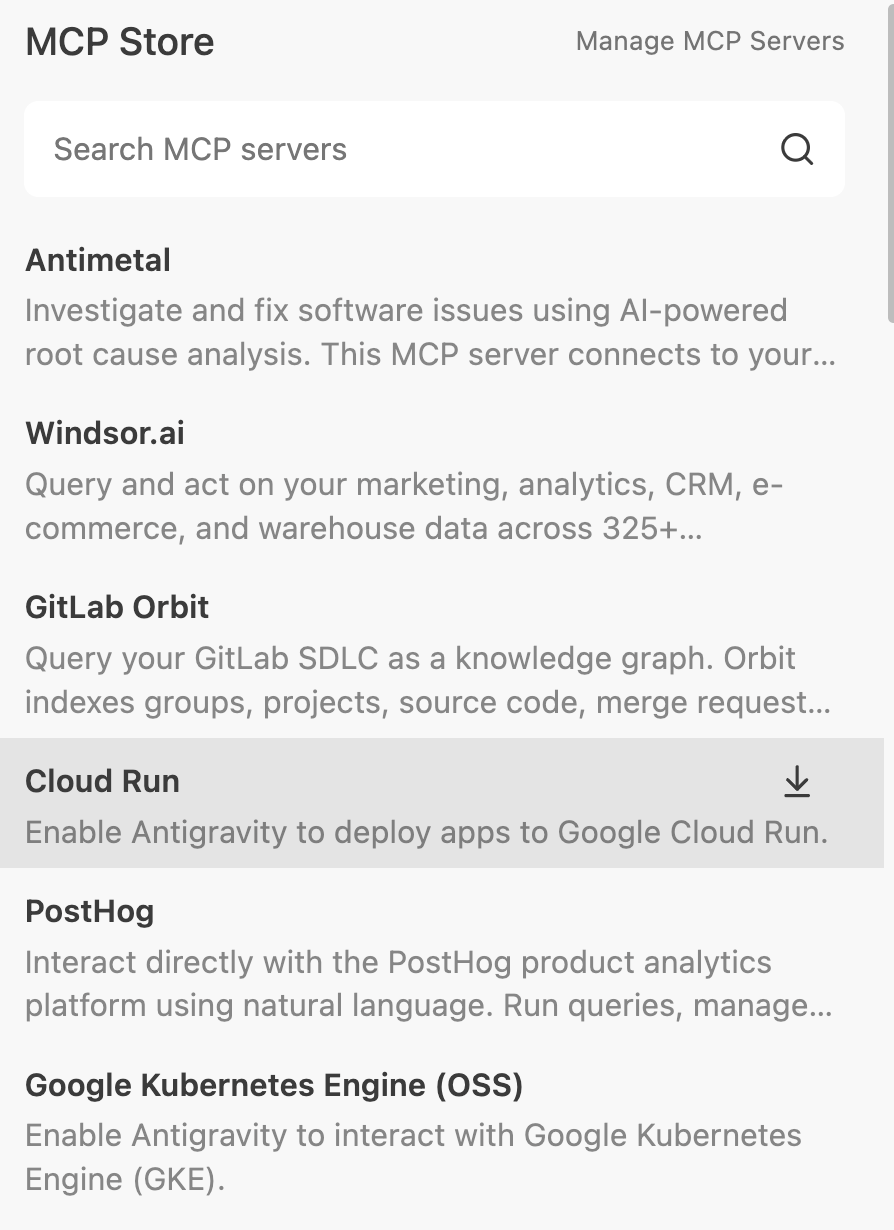
Search for a supported integration or open Manage MCP Servers. The visible providers are examples from the official screenshot, not required services for this lesson.
Unmodified official sample screenshot · Source: Google Codelabs · CC BY 4.0 · Click to enlarge
Choose the correct connection path
| Connection | What you need to know first | Where failures often surface |
|---|---|---|
| Supported store integration | Provider, account, and installation instructions | Sign-in or configuration prompts. |
| Local MCP process | Required runtime, executable, and provider arguments | Process startup and environment configuration. |
| Remote MCP endpoint | Provider's exact endpoint and authentication method | Network reachability, session, or resource access. |
A local process runs on your machine; a remote endpoint is hosted elsewhere. Do not copy a local command into a remote URL field, or assume every server accepts the same authentication fields. This tutorial deliberately uses the selected provider's current instructions instead of a generic configuration that may not work.
Before editing raw configuration, keep a private copy of the existing settings. Add one server entry, save, refresh the manager, and inspect the available tools before connecting another service.
2. Define a small verification target
Choose one item whose contents you already know: a sample issue, a test database table's columns, or a documentation page. Record its identifier. Give the account only the access needed for that exercise, and keep credentials out of prompts and version control.
After connecting, inspect the available tools. A saved configuration alone does not prove the server authenticated or exposed the capability you need.
Write down a connection checklist
Record the following without including secret values:
Server/provider: [name]
Connection: [local process or remote endpoint]
Test workspace/project: [identifier]
Known sample item: [identifier]
Expected title or state: [value you checked in the service]
Available read tool: [name shown after connecting]
Use the exact tool name returned by your installed server. Similar services can expose different tools, so a name copied from another tutorial is not proof that the capability exists. If you cannot identify a read tool for your test item, resolve that mismatch before running the verification.
3. Ask for a read-only result
Adapt this original prompt to your server and test item:
Use the connected MCP server to inspect the sample item I identify below.
First name the available read-only tool that fits this task.
Retrieve only that item and summarize its title and current state.
Report the identifier and tool used so I can compare the result.
Do not create, update, delete, deploy, or send anything.
If the tool is unavailable or access fails, explain the failure instead of guessing.
Sample item: [replace with your test item's identifier]
Compare the result with the service's own interface. The purpose is to verify a working connection and correct scope before depending on that service in a larger coding task.
4. Diagnose the failure layer
| Symptom | Check first |
|---|---|
| Configuration does not load | JSON syntax and required provider fields |
| Local server will not start | Installed runtime and executable path |
| Tools appear but access fails | Account login and resource permissions |
| Expected tool is missing | Server capabilities and enabled tools |
| Agent answers without calling a tool | Ask it to identify the tool and returned item |
Avoid repeated installation attempts until you know which layer failed. If the provider changes its setup, follow its current documentation rather than an old copied configuration.
Separate three kinds of success
- Configuration loaded: The manager recognizes the server entry.
- Tools available: The server exposes a tool suitable for your task.
- Correct data returned: A real call returns the item you expected from the intended account or project.
A connection is ready for this exercise only after all three checks. For an empty result, compare the item identifier and project scope before concluding the service is broken. For a permission error, check the selected account and access to that specific item in the provider's own interface.
A useful follow-up after success is:
Using the same verified read tool, inspect the sample issue.
Summarize the reproduction steps and identify which local source files
would be relevant to investigate. Do not change the issue or the code.
Keep the service's returned facts separate from your proposed explanation.
This connects external context to a coding task while keeping the result easy to check. If an experimental entry fails and you remove it, remove only that entry; keep other working integrations intact.
Completion checkpoint
You should be able to identify the connected server, the exact tool, the sample item returned, and the permissions used. Once that works, add one useful read-only lookup to a real task, such as checking a schema before writing a query.
Return to the tutorial library for the full learning path.